Showing posts with label tutorial. Show all posts

Mod Podge Photo Transfer Canvas

Mod Podge Photo Transfer Canvas
I love collecting and making accessories to decorate my ladder shelf (which I still haven't stained). So when I had the opportunity to try out Mod Podge's new Photo Transfer Medium I came up with the perfect idea to make small canvas art to add to the shelf.
Mod Podge Photo Transfer Medium
This new product is so easy to use and allows you to transfer a photo or image onto any surface!

What you need:
-Mod Podge Photo Transfer Medium (you can find this at Michael's )
-Art Canvas (I used a 6"x6" canvas)
-Sponge
-Printed Image
-Mod Podge Gloss-Lustre
-Craft Paint
Mod Podge Photo Transfer Canvas
Find an image you would like to transfer or design one using Photoshop. I had a few different art inspirations in mind when I designed this image.  

Edit your image and size it to fit your canvas. If there is any text make sure to reverse it.
Mod Podge Photo Transfer Canvas
Now you need to print the image.  I highly recommend you get it printed at Office Depot or Kinkos because toner copies work best. Trust me, I first tried the transfer using a copy I printed from my ink-jet printer and it did not turn out so well. I also want to mention that you can not use an actual photo or an image printed on photo paper. It must be printed on regular paper.
Mod Podge Photo Transfer Canvas
Once you have the printed copy, cut it out to fit the size of your canvas. Then completely cover the image with the transfer medium using a sponge.  Make sure to apply it generously.
Mod Podge Photo Transfer Canvas
Immediately after applying the medium, carefully smooth it over the canvas.
Mod Podge Photo Transfer Canvas
Wait 24 hours then take a wet sponge and wet the paper. Now start rubbing the paper away to reveal your transferred image! I rubbed more than needed because I wanted it to look a little distressed.
Mod Podge Photo Transfer Canvas
Wait for it to dry then rub off any leftover paper fuzz.
Mod Podge's Gloss Lustre
Brush on Mod Podge's Gloss Lustre to give the canvas a subtle glossy finish.
Mod Podge Photo Transfer Canvas
Now all you have to do is paint the edge of the canvas. I played around with different color options and decided on a light gray.
Mod Podge Photo Transfer Canvas
Easy art projects are the best!

For more project inspiration and info about Mod Podge products visit:
Follow Plaid Crafts on Pinterest

Disclosure: This post was written as part of a campaign with The Blueprint Social. All opinions are my own.

DIY Pallet Art

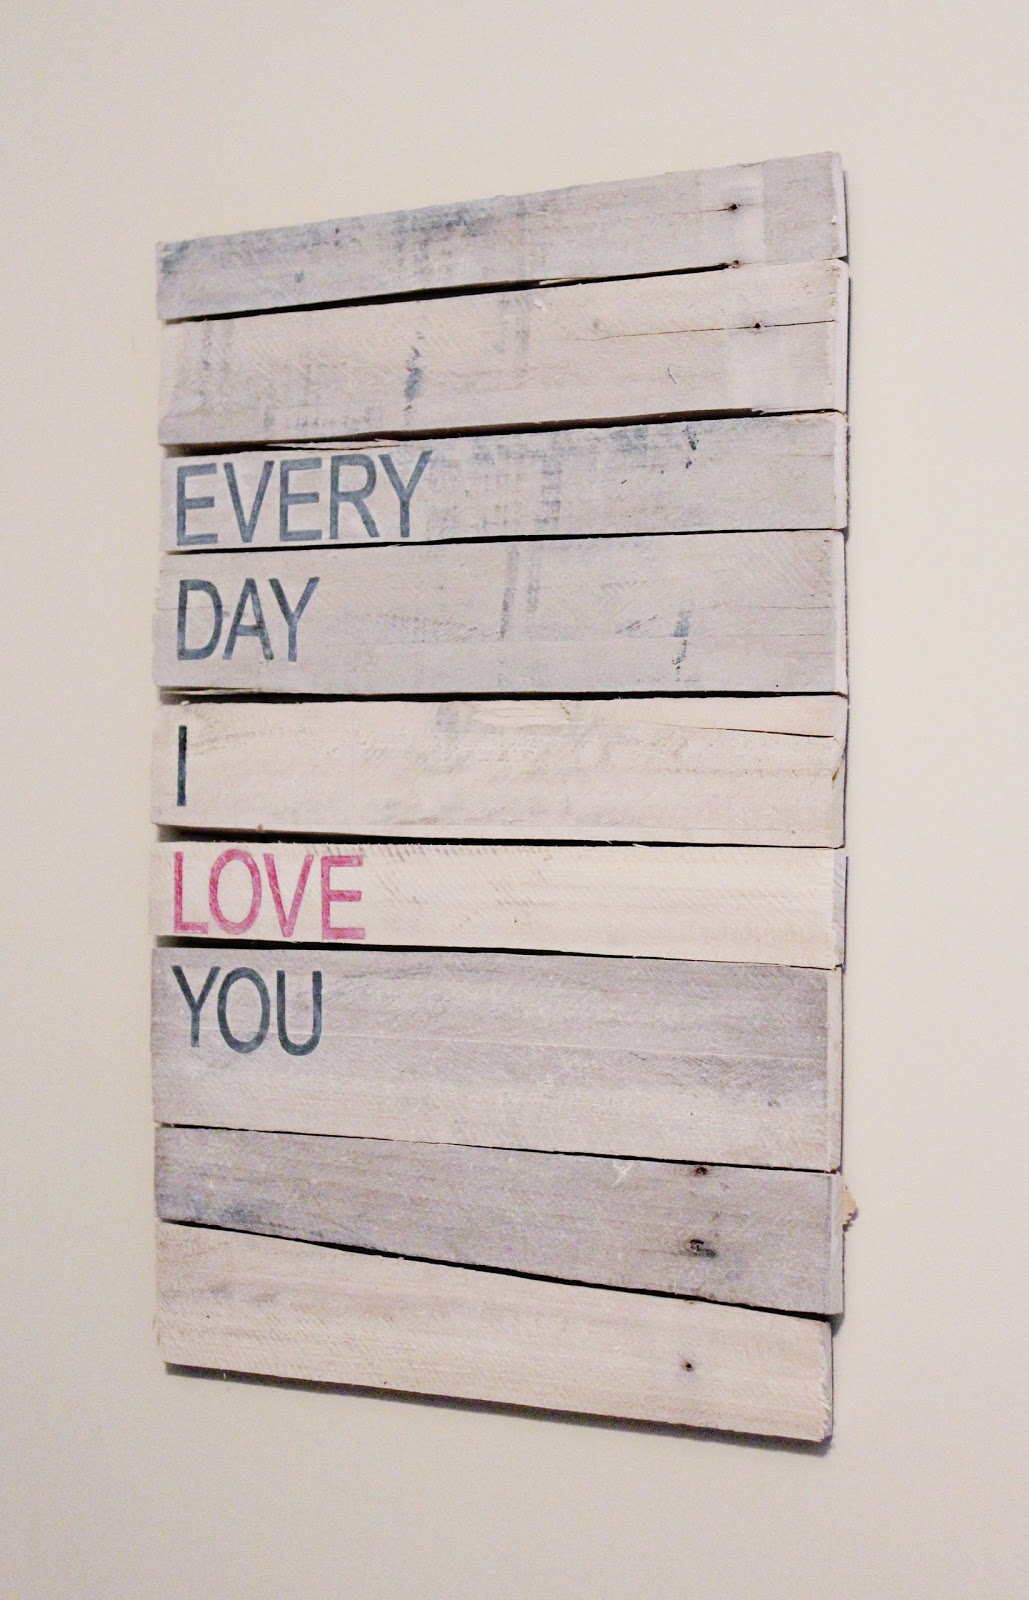
Pallet wall art perfect for Valentine's Day!
DIY Pallet Art    www.adorbymelissa.com
Since I had pallet boards left over from other projects, I decided to let nothing go to waste and made wall decor for our office.  
DIY Pallet Art    www.adorbymelissa.com
First I cut the boards so they would be about the same length.  Then to connect all the boards, I screwed a board lengthwise to the back. 
DIY Pallet Art    www.adorbymelissa.com
I wanted the wood to show through so I whitewashed the boards.  To do this, dilute ivory paint with water until you are satisfied with the consistency (I had an extra piece of wood to practice on). Then brush on a few coats to get your desired coverage.
DIY Pallet Art    www.adorbymelissa.com
For the lettering I made stencils by printing the letters I needed on cardstock and carefully cutting them out.
DIY Pallet Art    www.adorbymelissa.com
Now all I had to do was trace the letters on the boards and fill in with gray and red paint.
DIY Pallet Art    www.adorbymelissa.com
Then I brushed on a little more whitewash to distress the lettering a little.
DIY Pallet Art    www.adorbymelissa.com
The office is slowly coming together!
DIY Pallet Art    www.adorbymelissa.com

Conduit Pipe Drapery Rod


Conduit Pipe Drapery Rod Tutorial   www.adorbymelissa.com
I have seen several tutorials using plumbing pipe as drapery rods, but after I did my own research I found that it is way cheaper to use conduit pipe.  This is a great budget friendly alternative to long drapery rods.
Conduit Pipe Drapery Rod Tutorial   www.adorbymelissa.com

Total cost for rod= $16 + $7 for spray paint
Conduit Pipe Drapery Rod Tutorial   www.adorbymelissa.com
What you need for one rod:
- (2) 1/2" Black 90° Elbows
- (2) 1/2"x2" Black Steel Pipe Nipples
- (2) 1/2" Black Floor Flanges
- Conduit Pipe- Sold as a 10' pipe but Home Depot is nice enough to cut it for you. 
- Metallic Spray Paint
Conduit Pipe Drapery Rod Tutorial   www.adorbymelissa.com
Tightly screw the three plumbing parts together.
Conduit Pipe Drapery Rod Tutorial   www.adorbymelissa.com
Now spray paint the pipe and the flange/elbow combo. I used Rust-Oleum Oil Rubbed Bronze.
Conduit Pipe Drapery Rod Tutorial   www.adorbymelissa.com
After the paint is completely dry, screw in the pipe and drill both flanges to the wall.

The best part about using a 1/2" pipe is that it works perfectly with my fav cheap drapery clips from Wal-Mart. I love how they give an illusion of pleated drapery panels.
Conduit Pipe Drapery Rod Tutorial   www.adorbymelissa.com
It adds the perfect touch of industrial accent, and works great on my large dining area window.
Conduit Pipe Drapery Rod Tutorial   www.adorbymelissa.com

Calendar Tutorial

Here is a quick and easy DIY to start off the new year!

A calendar display board!

Calendar Tutorial www.adorbymelissa.com
I  found this 12"x9" wood board with a decorative edge at Wal-Mart for $5. I painted and glazed it, and then painted a rectangle at the top using chalkboard paint. After it dried, I added a nail below the chalkboard to hang the calendar from. 
Calendar Tutorial www.adorbymelissa.com
I downloaded this adorable mini calendar from The Ink Nest!
Calendar Tutorial www.adorbymelissa.com
I printed out the calendar and cross stitched the corners to pieces of canvas.  Then I made a loop out of twine and hot glued it to the back.
Calendar Tutorial www.adorbymelissa.com


Triple Pocket Napkin Fold Tutorial

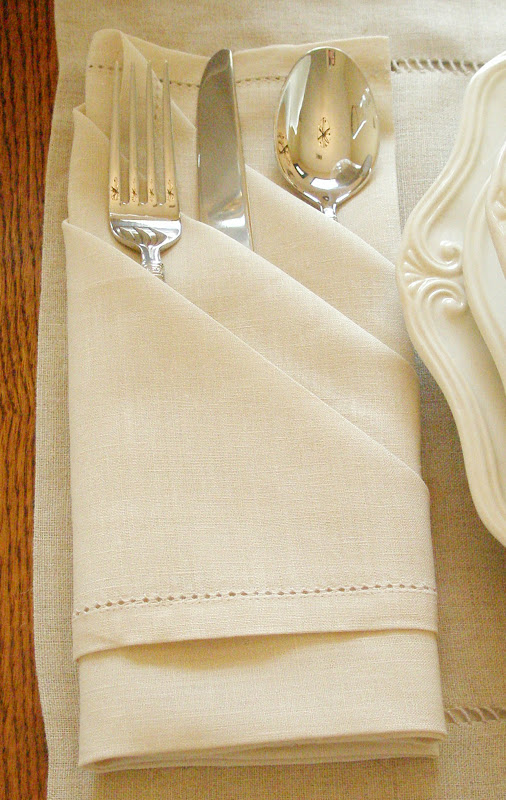
You might remember this napkin fold from my Fall pumpkin table setting...
Triple Pocket Napkin Fold Tutorial   www.adorbymelissa.com
I have gotten several requests for a tutorial showing how to fold a napkin with three pockets, so I thought I would share a quick how-to just in time for your holiday parties!

Triple Pocket Napkin Fold Tutorial   www.adorbymelissa.com

Burlap & Moss Banner DIY

We are slowly making progress on our office/craft room.  I'm not ready to reveal the entire room yet, but I will show you how I decorated my craft cabinet. I also made a burlap banner with moss monogram to hang above the cabinet!
Burlap & Moss Banner DIY
What you need:
  • Burlap
  • Sheet of moss (you can find these at Hobby Lobby)
  • Jute twine
  • Dowel
  • Hot glue gun
  • Card stock 

Burlap & Moss Banner DIY
What to do:

  • Using a straight edge, draw a simple banner shape on the burlap.
  • After you cut out the banner, fold the top down to create a loop and secure with hot glue. Make sure you leave enough space to be able to slide in the dowel.
  • Tie one end of the jute twine on the end of the dowel. Slide it in the top of the burlap and tie the twine on the end of the dowel. Cut off the excess twine.
  • Now draw or print out a large letter on a piece of card stock.  Cut out the letter and lay it on the back of the moss sheet.  Trace around the letter with a permanent marker.
  • After you cut out the moss letter, position it on the front of the banner and secure with hot glue.
That's it! Pretty easy right?

Burlap & Moss Banner DIY
I think it adds a nice Fallish touch!

Burlap & Moss Banner DIY