Brooches seem so fallish to me! I am so glad it’s finally fall, but I just wish it would start feeling like it! It was def in the 90’s today!
So to get in the mood of the season I decided to make a little autumn craft.
A fabric brooch pin!
What you need:
-Wool (felt would prob work too)
-2 other cotton fabrics
-sewing machine (hand sewing works too if you prefer)
-needle and thread
-permanent fabric glue (I love fabri-tac)
-pin back
This brooch consists of three diff pieces.
For this first part we are making a wool ruffle flower.
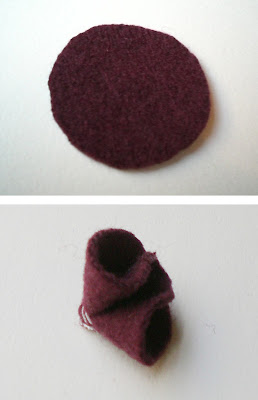
Cut seven 1” circles.
Fold the circles in half and then in half again. Make a few quick stitches at the corner the hold in place.
Cut a small flower shape a little over an inch (this will be the base)
Start stitching the folded petals to the base. I put 5 around the edge and 2 in the middle.
And that completes part one!
For this next part we will make a fabric yoyo!
Cut a 5 1/2“ circle
Sew a straight stitch at the longest stitch length around the edge of the circle.
This can also easily be done my hand with a needle and thread.
Pull the bottom (bobbin) thread while you push the fabric so it starts bunching. Be gentle so you don’t break the thread. It helps if you work from both ends of the thread.
After it is bunched as far as it will go, tie off the ends and flatten it out so it looks like a nice ruffled circle.
Yoyo….…check!
You’re almost done. Yay!
Cut a strip of fabric 10 1/2“ x 2”
Fold it in half (hot dog style) and pin it in place.
Now sew along all the open edges.
Pull the bobbin thread, same as before, and bunch up as you pull.
When you have a pretty ruffled C shape you can tie off the ends.
And now your done making all the components!
Now it's time to assemble the brooch!
Start by placing the C shaped ruffle on the yoyo. Make sure the ends are touching the edge of the yoyo and the center part of the yoyo is fully covered.
Once you like the placement, glue it in place using your fabric glue.
Now place the wool ruffle flower on top of the C ruffle, it needs to cover the rough edges. It looks good if it is placed right up to the edge of the yoyo.
When you have it where you like it, glue it down.
I attached a piece of felt to the back to add support and stiffness.
Now all you have to do is attach the pin back. The one I used had an adhesive backing but I still added some glue.
It took me a couple tries to get the placement right. You’ll just have to play around with it. But it does need to be towards the top of the brooch (not in the center like I tried the first time)
Now your Fall Fabric Brooch is complete! Yay!
I hope you enjoyed this tutorial. Let me know if you try it!
And I want to thank those of you who featured or linked to my
Ruffle Headband Tutorial:
Not So Homemade (She followed the tutorial and made one of her own)
You Can Do It
The Craft Cave
Saving Money & Living Life
Dry Erase Notepad Tutorial:
Bargain Shopping Paradise
Candle Craft Tutorial:
Crafts & Such
Langes Fädchen, Faules Mädchen (she made some really cute Halloween candles)
Tatertots & Jello
Thanks guys!


