Showing posts with label diy. Show all posts

Thrift Store Painting Makeover

Thrift Store Painting Makeover
I found a couple of framed bird prints at the thrift store for less than a dollar and I thought this would be the perfect opportunity to create some cute artwork for my bathroom!

Before:
Thrift Store Painting Makeover

Think of it as a "paint by numbers" and just fill in the shapes! I chose bright colors for the birds and soft shades of mint green for the background to coordinate with other accessories in my bathroom.
Thrift Store Painting Makeover
After the paint was completely dry I sponged on Mod Podge's Gloss Lustre to protect it from the moisture. 

Thrift Store Painting Makeover

Thrift Store Painting Makeover

Thrift Store Painting Makeover
 To update the frames I painted them with a tan craft paint and then rubbed on Rust-Oleum Glaze in Java Brown.
Thrift Store Painting Makeover
 These updated paintings fit perfectly between to door in bathroom!
Thrift Store Painting Makeover
This is a great painting project for those that claim to have no artistic talent or beginner painters. It was super easy!

Easy Bench DIY

Jake and I built this bench last October and I just realized that I never shared it here.  We are actually very proud that we made this all by ourselves without the help of my dad or Papa!
   Dining Bench DIY
We followed this dining room bench tutorial from Dear Lillie. It was really easy to follow and didn't take very long to make!
Dining Bench DIY
We bought all the supplies at Home Depot and had them cut all the pieces to size. So all we had to do was drill and assemble!
Dining Bench DIY

Dining Bench DIY
After I sanded the edges I painted it Martha Stewart Bedford Gray.
Dining Bench DIY
Dining Bench DIY
Dining Bench DIY
I will share an update as soon as I get around to upholstering the seat!

DIY Pallet Art

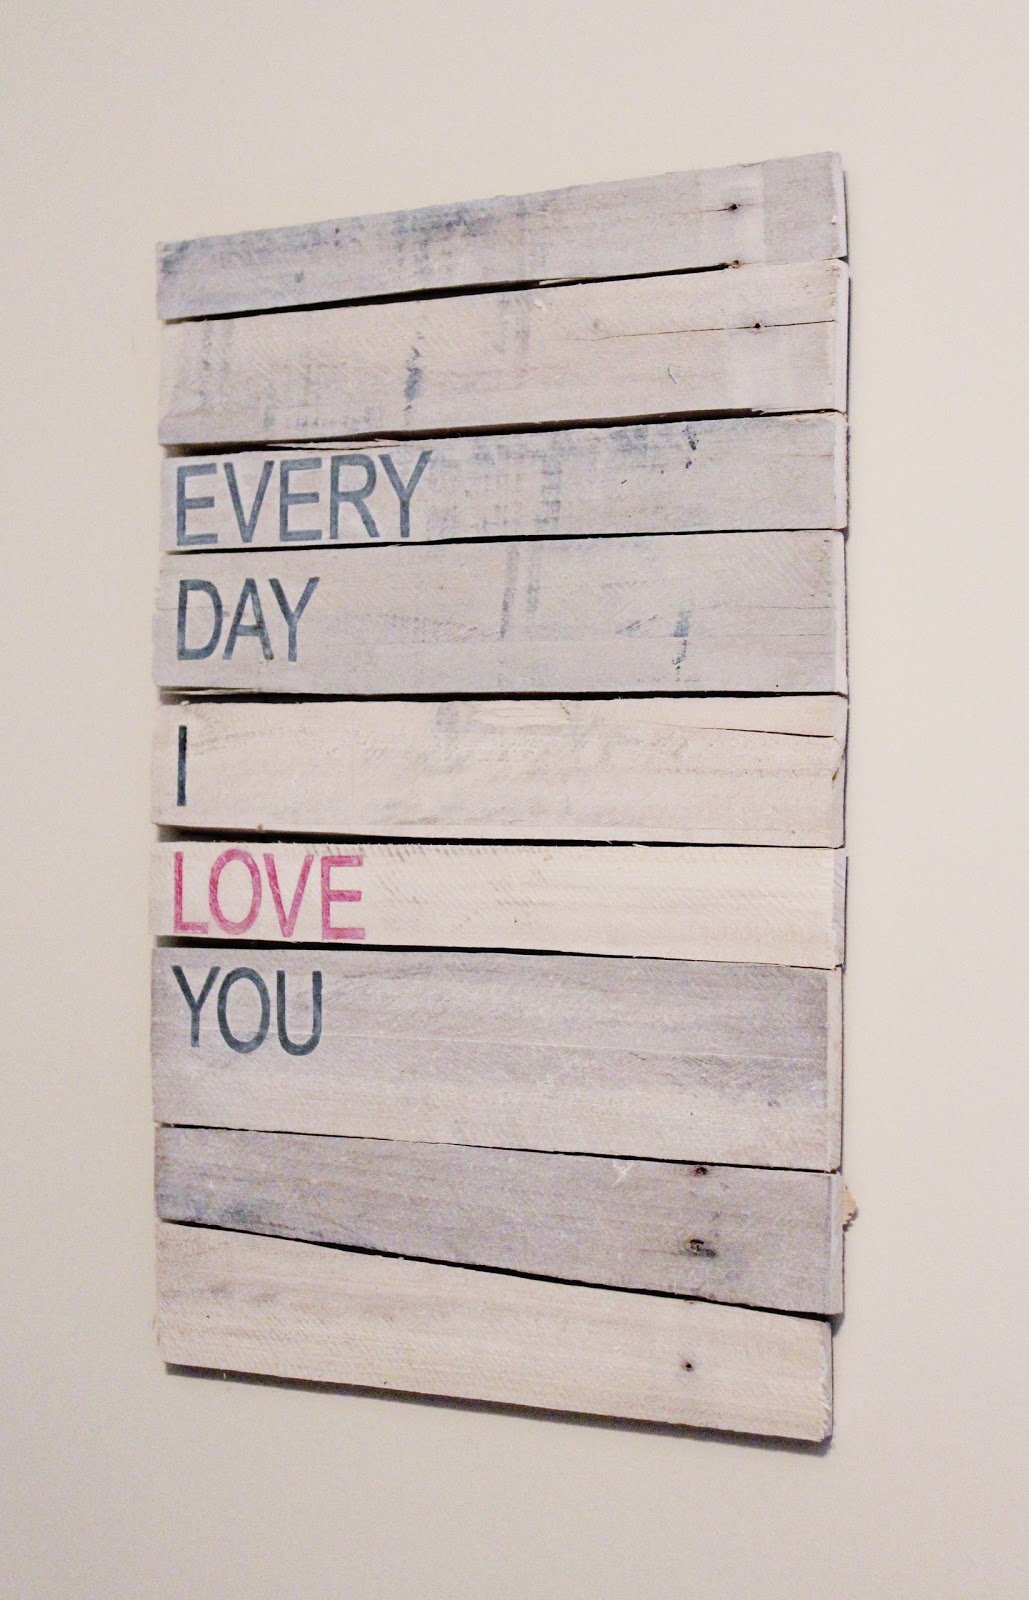
Pallet wall art perfect for Valentine's Day!
DIY Pallet Art    www.adorbymelissa.com
Since I had pallet boards left over from other projects, I decided to let nothing go to waste and made wall decor for our office.  
DIY Pallet Art    www.adorbymelissa.com
First I cut the boards so they would be about the same length.  Then to connect all the boards, I screwed a board lengthwise to the back. 
DIY Pallet Art    www.adorbymelissa.com
I wanted the wood to show through so I whitewashed the boards.  To do this, dilute ivory paint with water until you are satisfied with the consistency (I had an extra piece of wood to practice on). Then brush on a few coats to get your desired coverage.
DIY Pallet Art    www.adorbymelissa.com
For the lettering I made stencils by printing the letters I needed on cardstock and carefully cutting them out.
DIY Pallet Art    www.adorbymelissa.com
Now all I had to do was trace the letters on the boards and fill in with gray and red paint.
DIY Pallet Art    www.adorbymelissa.com
Then I brushed on a little more whitewash to distress the lettering a little.
DIY Pallet Art    www.adorbymelissa.com
The office is slowly coming together!
DIY Pallet Art    www.adorbymelissa.com

Conduit Pipe Drapery Rod


Conduit Pipe Drapery Rod Tutorial   www.adorbymelissa.com
I have seen several tutorials using plumbing pipe as drapery rods, but after I did my own research I found that it is way cheaper to use conduit pipe.  This is a great budget friendly alternative to long drapery rods.
Conduit Pipe Drapery Rod Tutorial   www.adorbymelissa.com

Total cost for rod= $16 + $7 for spray paint
Conduit Pipe Drapery Rod Tutorial   www.adorbymelissa.com
What you need for one rod:
- (2) 1/2" Black 90° Elbows
- (2) 1/2"x2" Black Steel Pipe Nipples
- (2) 1/2" Black Floor Flanges
- Conduit Pipe- Sold as a 10' pipe but Home Depot is nice enough to cut it for you. 
- Metallic Spray Paint
Conduit Pipe Drapery Rod Tutorial   www.adorbymelissa.com
Tightly screw the three plumbing parts together.
Conduit Pipe Drapery Rod Tutorial   www.adorbymelissa.com
Now spray paint the pipe and the flange/elbow combo. I used Rust-Oleum Oil Rubbed Bronze.
Conduit Pipe Drapery Rod Tutorial   www.adorbymelissa.com
After the paint is completely dry, screw in the pipe and drill both flanges to the wall.

The best part about using a 1/2" pipe is that it works perfectly with my fav cheap drapery clips from Wal-Mart. I love how they give an illusion of pleated drapery panels.
Conduit Pipe Drapery Rod Tutorial   www.adorbymelissa.com
It adds the perfect touch of industrial accent, and works great on my large dining area window.
Conduit Pipe Drapery Rod Tutorial   www.adorbymelissa.com

Calendar Tutorial

Here is a quick and easy DIY to start off the new year!

A calendar display board!

Calendar Tutorial www.adorbymelissa.com
I  found this 12"x9" wood board with a decorative edge at Wal-Mart for $5. I painted and glazed it, and then painted a rectangle at the top using chalkboard paint. After it dried, I added a nail below the chalkboard to hang the calendar from. 
Calendar Tutorial www.adorbymelissa.com
I downloaded this adorable mini calendar from The Ink Nest!
Calendar Tutorial www.adorbymelissa.com
I printed out the calendar and cross stitched the corners to pieces of canvas.  Then I made a loop out of twine and hot glued it to the back.
Calendar Tutorial www.adorbymelissa.com


Sock Glove DIY

I came across a cute sock glove tutorial on Ruffles and Stuff and thought it would be a fun Christmas project. It's also a great way to recycle some old argyle socks that are a little worn in the heel.

I pretty much followed her instructions except I only used one pair of knee high socks instead of piecing together several smaller socks.
Sock Glove DIY www.adorbymelissa.com
These would be perfect stocking stuffers!
Sock Glove DIY www.adorbymelissa.com
I had another pair of knee high argyle socks so I decided to make a second pair of gloves.
Sock Glove DIY www.adorbymelissa.com
They were really easy to make and didn't take long at all!