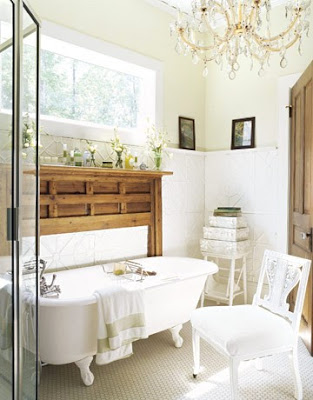
inspiration via pinterest

Pinterest is a great source for discovering inspiration, and I am loving it!

Here are some of my most recent bathroom inspirations. Enjoy!
Look how nicely the mantel frames the clawfoot tub.  Genius.
Beadboard in the bathroom...love it!
 This reminds me of my hanging room dividers post
(so want to do this)
I have always been in love with subway tiles!
In my dreams...


(photos via pinterest)

shoe clip tutorial

Shoe clips!

The perfect spring accessory to make your plain flats or pumps more interesting.  

So get to crafting! This won't take long!
These shoe clips were inspired by the button earrings I made.  They are basically made the same way.

What you need:
-cardboard (I used a cereal box)
-batting
-fabric
-needle and thread
-felt
-scissors  
-clip (hair clip or clip on earring)
-hot glue gun

What to do:
-Draw a 2 inch diameter circle on the cardboard and cut it out.
-Then cut out a 3.5 inch diameter circle from the fabric.

-Sew a loose stitch around the edge of the circle.  Then pull to slightly gather.  Don't cut the thread yet.
-Cut a piece of batting the same size as the cardboard circle.

 -Now it's time to assemble the pieces.

-Place the batting circle on top of the sewn fabric circle and the cardboard on top of that.
-Now pull the thread to completely close the fabric around the cardboard and batting. 

-Make sure the fabric is pulled tightly around the edges.  It helps to sew a few quick stitched on the back to ensure that everything is securely in place. Knot and cut the thread.
-Repeat these steps to make a pair.

-Then cut out two felt circles that are slightly smaller and glue on the back. 
-Now glue the clip on earrings to the back of the shoe clips.

-You can use just about any kind of clip to temporarily attach them to your shoes.
(bobby pins or hair clips will work great)
For these, instead of gluing the clips on, I cut two small slits in the felt and slid in one end of the clip.

These were so easy to make that I had to make a few more!


Too cute right?


Enjoy your weekend!

midweek cuteness

It's time for a Coco update!

The last time I blogged about her she was only ten weeks old and now she is 5 months!
I can't get over how big she has gotten! Look at this post to see how much she has grown.
She likes to pose for the camera...
look out the window...
and sleep on my lap while I try to blog!

fringe necklace

This is it! The last necklace of the week! 

Necklace #5: Fringe Necklace
 Adding this simply made necklace to a plain shirt will totally transform your look.
 
This was the inspiration:
 
 You can find the tutorial on InStyle.com.  In just a few simple steps you will have an adorable new statement necklace!


I'm kind of sad that necklace week is over!  
I might just have to do another one...

tassel necklace

This is the easiest DIY statement necklace! And since I already had everything needed to make it, I spent $0 on this necklace!

What you need:
tassel, charm, beads, necklace chain, ribbon
Slip a couple of beads on the tassel and string it on the necklace chain.  Then string on a charm.

The necklace chain I had wasn't as long as I wanted for this particular necklace style so I came up with a quick and easy trick to make it longer.
All you have to do is cut a couple pieces of ribbon and thread them through each end of the necklace chain.

Fold the ribbon in half and thread a bead onto the folded ribbon.

This will secure the ribbon in place.


See that wasn't too hard!